TL;DR
Claude Code can build small design tools that run on your own computer.
A free starter kit called Toolcraft gives every tool a clean workspace and toolbar.
Write your prompt as a goal first, then a short list of features.
Expect a few bugs on the first build and fix them with a second prompt.
Exports land on your desktop, ready for Illustrator, Photoshop or Figma.
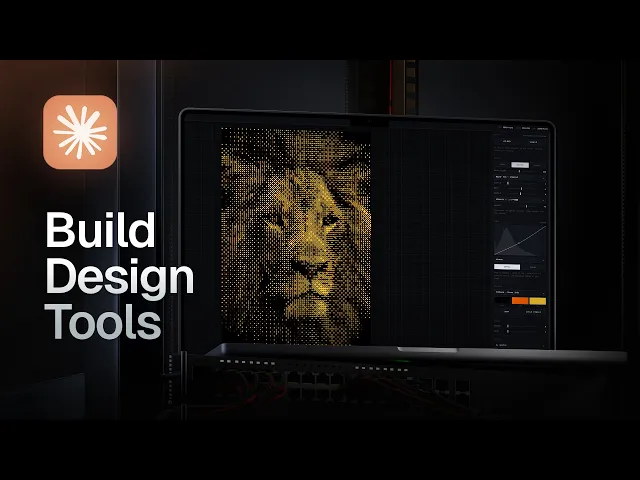
You can build your own design tools with Claude Code in an afternoon. A gradient maker, a pixel effect editor or a sticker mockup tool can all come from one plain English prompt.
Most of us pay for a pile of small design apps. Each one does one trick, and the subscriptions add up fast. I would rather build the exact tool I need for a branding or website project.
Here is how I set it up, the tools I have built, and how I write the prompt.
What you need before you start
You need Claude Code and a paid plan. I use Pro or Max. The free plan runs out of credits too quickly for this kind of build.
I also use a free starter kit called Toolcraft. It was made by Alex, who runs an agency and the Pixel Point YouTube channel. It is an open source UI kit that gives every tool you build a clean workspace.
You still decide what the tool does. Toolcraft just makes the layers, panels and toolbars look good. Alex built it from the tools his team made for real clients.
Copy the install command from the Toolcraft page. It starts with npx.
Open Claude Code and start a new session.
Paste the command into the prompt box at the bottom and run it.
Let it install. It brings in React, Tailwind and a few other pieces it needs.
A gradient tool for brand textures
The first tool I made is a gradient randomizer. I press the space bar and it throws out a new gradient. I can keep pressing until something looks right.
Then I take control of the details.
Colour modes: complementary, monochrome or wide spectrum, plus custom colours.
Layouts: stack, halo, pivot, ribbon or scatter, with rotation.
Gradient types: linear, conic or radial.
Finish: overlays, shuffled shapes and grain with its own size and amount.
When it looks right, I export a 4K PNG. It lands on my desktop and goes straight into Illustrator, Photoshop or Figma.
One thing to know. These tools run locally on my computer. If I refresh the page, it resets. If you want settings saved, you can connect it to something like Vercel or Supabase.
A pixel and dither editor for effects
The second tool turns any photo into a pixel, dither or ASCII style image. I upload an image, pick a style, then push the sliders.
Change the levels and the bias.
Switch the pattern between halftone, dots, noise and blocks.
Invert it, add an S curve or go tritone.
Keep the original colours, or add grain.
In a minute or two I have a finished effect ready to export. If you want one look to run through a whole branding project, this is a fast way to do it.
Brand guidelines your client can click through
I also built an interactive brand guidelines page. Instead of a PDF or a page on a website, the client opens it and clicks around.
They can download all their assets from one place. They can also open a PDF file and import their guidelines into it. I can add more tools to it over time.
How I write the prompt
I usually run Opus 5. Sometimes I use Fable 5 to plan, because it is very good at planning. I leave the effort setting around high.
My prompt always has two parts: the goal, then the features.
For a sticker tool, my goal was simple. Build a sticker creator that turns any vector shape, logo or image I upload into a sticker mockup. Then I listed the features I wanted underneath.
You can attach reference images too. I left them out on purpose to keep the test simple.
When it finished, I clicked the button to open it in my default browser. It is easier to play with there.
Here is what the first build gave me:
An infinite canvas with a background colour I can change or turn off.
A resolution scale and a light or dark theme.
Upload for my artwork. I used a client logo.
Sticker size, rotation and a shape swap between circle, triangle and square.
A drop shadow with its own colour.
Texture upload and export to PNG or JPEG.
Fix the bugs with a second prompt
The first build was not perfect. The sticker fill did not work. The outline did not work either. The drop shadow offset broke when I dragged the sticker.
That is normal. You fix it the same way you built it, by asking.
I like to use voice for this. In Claude Code I press Ctrl and D and just talk. Here is roughly what I said:
Debug and test the creator.
Fix the outline and the sticker fill.
Fix the drop shadow offset when I drag the sticker.
Add a fold effect I can turn on, so the sticker looks more 3D.
Test it and make sure it all works.
After a bit of tweaking, I had a working sticker tool with all the effects I wanted.
Why this matters for your studio
Each of these tools does one job I used to pay for or do by hand. Now they fit my process exactly, because I described them.
You can keep them for yourself or hand them to a client. A tool that makes on brand textures or stickers is a nice extra on a brand project.
If you want help building the skills to win those projects, that is what we do in Designer School.
The bottom line
Claude Code can build the small design tools you keep paying for. Start with a clear goal and a list of features. Then test it, ask for fixes and keep the tool forever.
Questions, answered
Can Claude Code build design tools without coding experience?
Yes. You describe the goal and the features in plain English and Claude Code writes the tool. You still need to test it and ask for fixes when something does not work. I build mine this way without writing the code myself.
Do I need a paid Claude plan to use Claude Code?
For this kind of work, yes. I use a Pro or Max plan. On the free plan you will run out of credits before the tool is finished.
What is Toolcraft for Claude Code?
Toolcraft is an open source starter UI kit made by Alex from the Pixel Point channel. You paste its install command into Claude Code. It then gives any tool you build a tidy workspace with layers and toolbars.
Do tools built with Claude Code save my work?
Not by default. My tools run locally, so a refresh resets them. If you want your settings saved, you can connect the tool to a service like Vercel or Supabase.
What design tools can I build with Claude Code?
I have built a gradient generator, a pixel and dither editor, a sticker mockup creator and an interactive brand guidelines page. Anything with sliders, an upload and an export button is a good fit.

Written by Jeremy Mura
Brand designer, founder of Mura Studio and Designer School